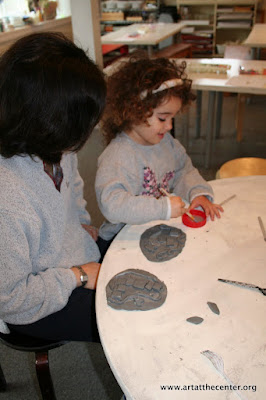
The Family Studio class will often play with clay at the end of class. Because the children in this class are so young, we will usually reshape the clay back into balls when it is time to clean up. During this class, however, each family member was able to create a clay sculpture that will be fired and that they will then be able to glaze. The students started out with a thin and flat circle of clay. Then they were able to build up from that surface with smaller pieces of clay that they could form into shapes or leave as they were. Everyone was taught how to score the clay and use slip to help make the pieces withstand the firing process and still stick together. This was a great project for parents to work on with their children. Everyone seemed to really enjoy the experience.
 There was one parent in particular who really enjoyed working with the clay. In previous classes he was more comfortable observing and helping his children with their art-making. But today he was ready to get his hands dirty. He made a beautiful and detailed miniature town out of the smaller pieces of clay and attached them to the flat circular slab.
 Here are some of the kids' clay sculptures. I cannot wait to see what they look like after they are fired and glazed. Stay tuned!
 Several new students have joined our Saturday Studio class. Our once small class is now bustling with new energy. There were several different art-making experiences going on this particular Saturday. We started out by making mandalas, then students were able to create mixed media collages, learn how to do paper-making, and work with clay.
This particular collage was made by a student who usually gravitates towards drawing. She tried something new on this day and it really turned out wonderfully. I think she really enjoyed the experience.
 Many of the students were already familiar with paper-making, but it was an entirely new experience for me. First you add small pieces of paper to water and you blend it up with a blender. Kathryn already had two colors of paper pre-blended- green and pink. You use screens and dip them into the water pulling out the paper and letting the water drip back into the tray.
You then flip the screen over onto newspaper and dab up the excess water with a sponge. Once you lift the screen, the paper is left to dry on the newspaper sheet. After it dries it easily peels off. In our next class, students will be able to use their homemade paper in a collage making experience.


No comments:
Post a Comment